|
|
|||||||
| The Folding Knife (& Switchblade) Forum The materials, techniques and the designing of folding knives. |
 |
|
|
Thread Tools | Display Modes |
|
#1
 12-26-2009, 11:42 AM
|
||||
|
||||
|
WIP - linerless slipjoint
Alright! I'll get the ball rolling with a couple quick photos and some explanations:
First I designed the folder using Google Sketchup. I incorporated a bunch of stuff that I read in my research, such as angles on the mating surfaces, half-stop, and a bunch of other stuff. I didn't get too technical with it, since this was just the design part, and I'd still end up fine tuning the the steel. What I did use it for, however, was design of the blade shape, pivot, handle, etc. Basically everything that you might do on paper, with the added benefit of being able to rotate the blade at the pivot and make sure the shape of the spring was correct and digitally tune the joint. Here's a pic of the resulting design in Sketchup: 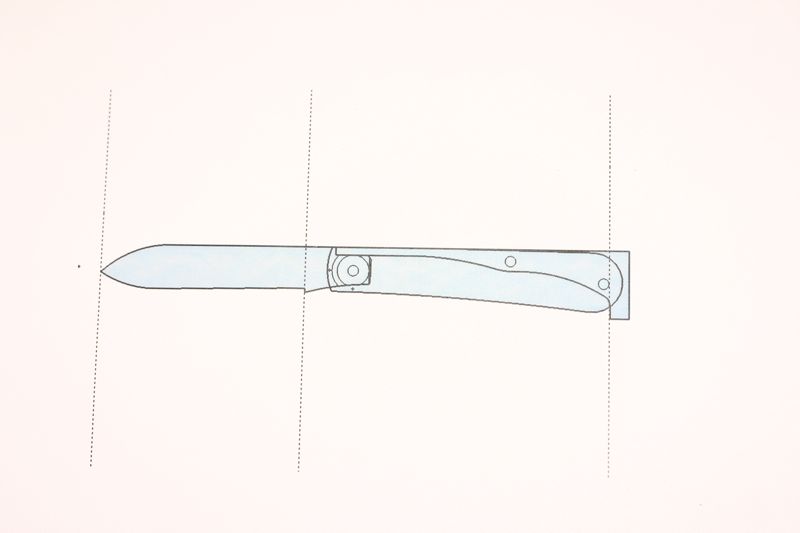 Next I printed out the design and cut out the blade and spring: 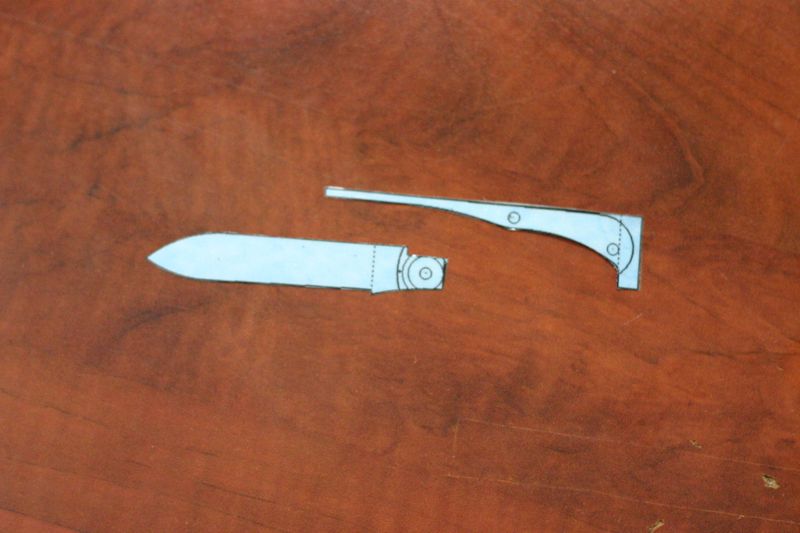 I laid these out on a bar of precision ground 1/16" thick O1. I really love O1, and use it for a lot of knives. I'll have to be careful about heat treating the spring, to be sure I get it to a good spring temper, but that shouldn't be a real problem. After scribing the designs I cut them out on the band saw and gave them a rough clean-up on the 1x42 grinder: 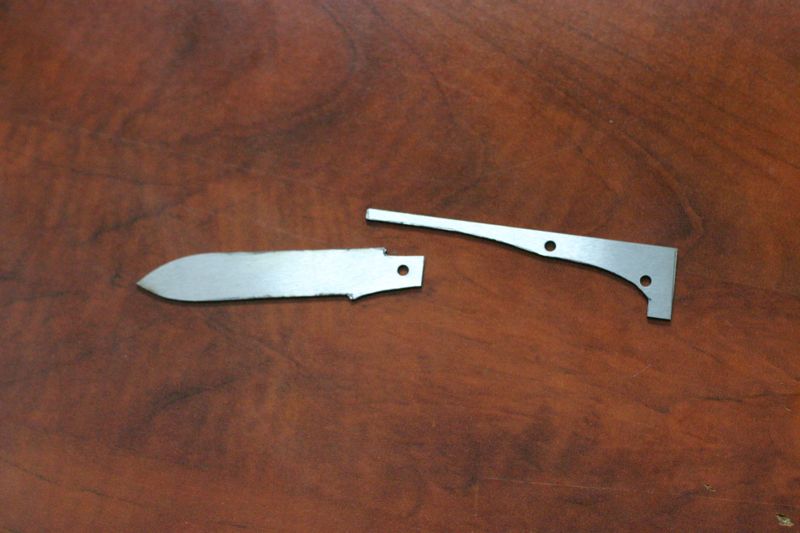 I didn't try to get too precise in the joint area. Even the 1x42 grinder is too inaccurate for that job, so I'll get everything fitting right by using files. In the next installment I'll get the spring/blade mating surfaces fitted using the technique I learned from reading Chris Crawford's excellent tutorial. Off to the workshop! __________________ Kurt Huhn pipecrafter@pipecrafter.com http://www.pipecrafter.com 
|
|
#2
12-26-2009, 03:48 PM
|
||||
|
||||
|
I love seeing how folders go together, so this is great! I can't wait to see the next steps in this WIP--thanks for posting it
~Noah __________________
|
|
#3
12-26-2009, 03:48 PM
|
||||
|
||||
|
Here's a pic of the blade, spring, and alignment jig after I fine tuned everything and ground the bevels in:
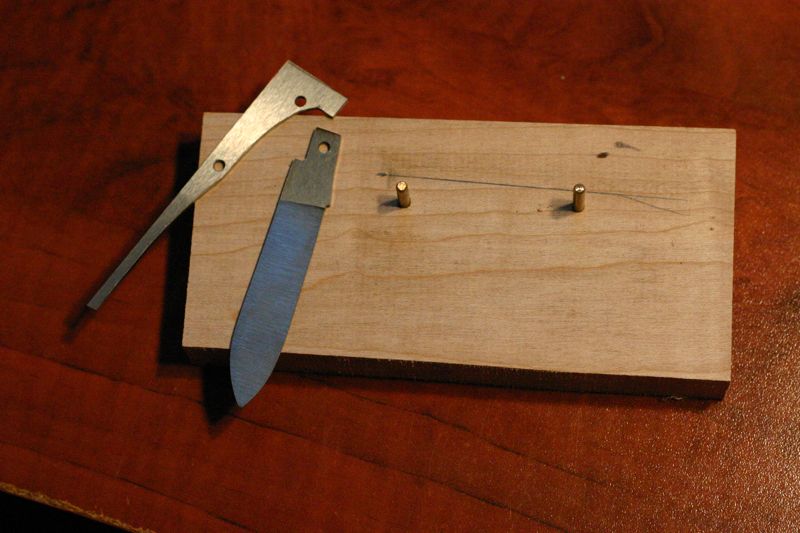 The next two photos show the jig in action. The first one is with the blade opened and the second with the blade closed. 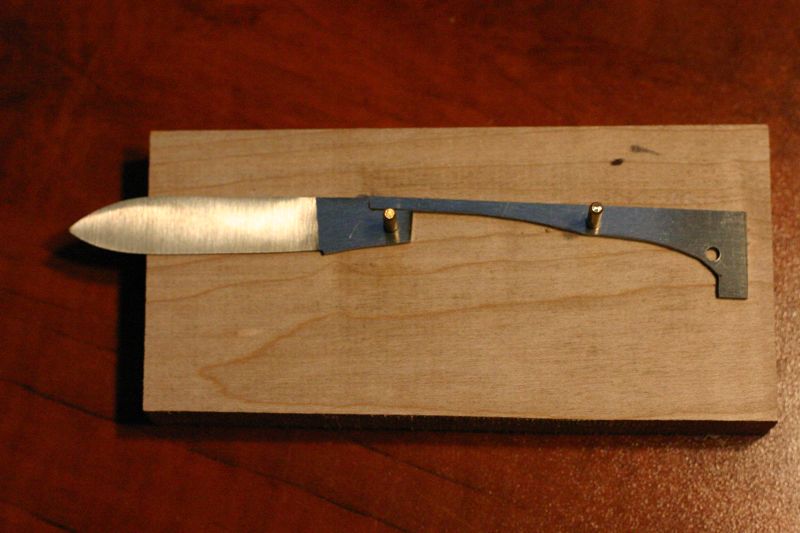 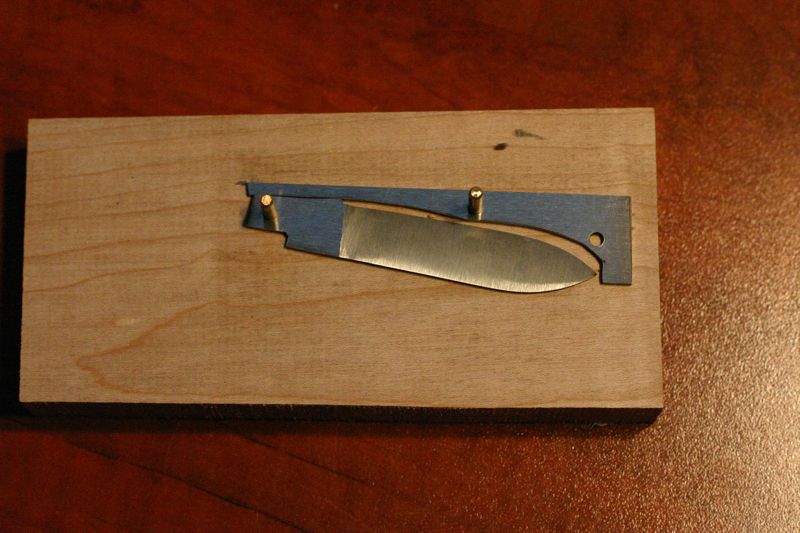 It actually took a lot of time tuning the action on the blade to get it right where it had to be. I was going to do it all with files, but in the end I actually used the 1x42 grinder with a worn out 240 grit belt to tune the mating surfaces. I felt I had a lot more control that way, and was able to remove minute amounts of material each time. The next two photos show that I was able to get the action pretty much spot on. There may be some final tuning that will need done after heat treat, but it should be minimal. There's a line on teh wood block that indicates where the spring rests with the blade in the open position, and after a lot of fiddling, I was able to get it in the same position with the blade closed. It's really tough to see in these photos, but it's visible in the first image in this post. 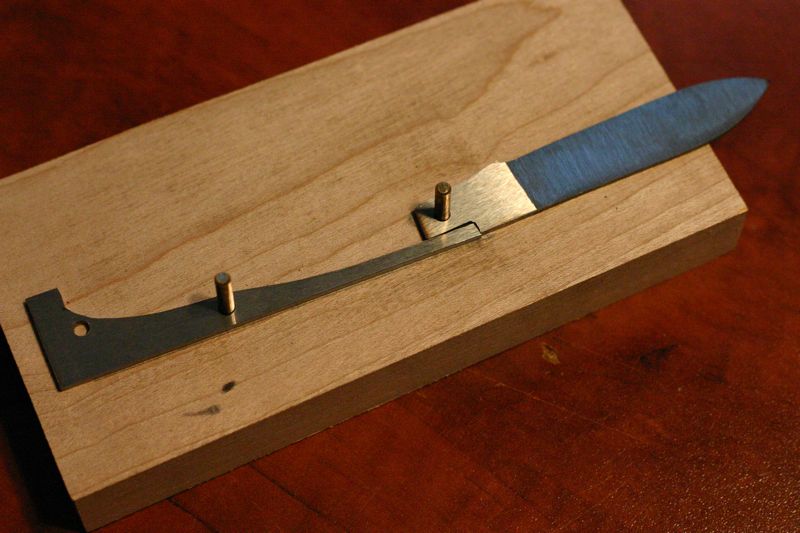 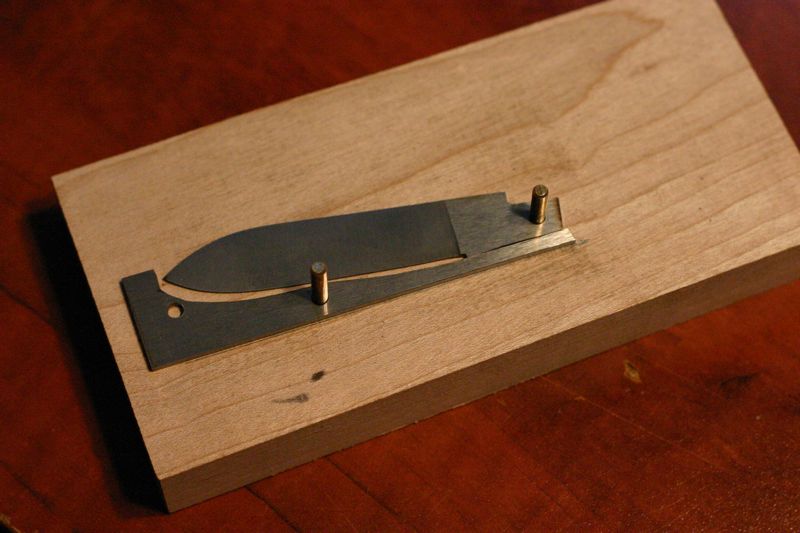 While I had the blade up from the workshop for photos I decided to give the flats a good working over pre-heat treat. What I use is a 9x12 granite machinists plate and some good, high quality, wet-or-dry sandpaper. I adhere the sandpaper to the plate with window cleaner, weight it with a brass bar at one side, and use window cleaner as a lube for sanding. I only worked through 320 grit at this point.  Here's a photo ready for heat treat. I also gave the spring a good once-over near the pivot to remove the marks from being precision ground. This should help the action quite a bit. 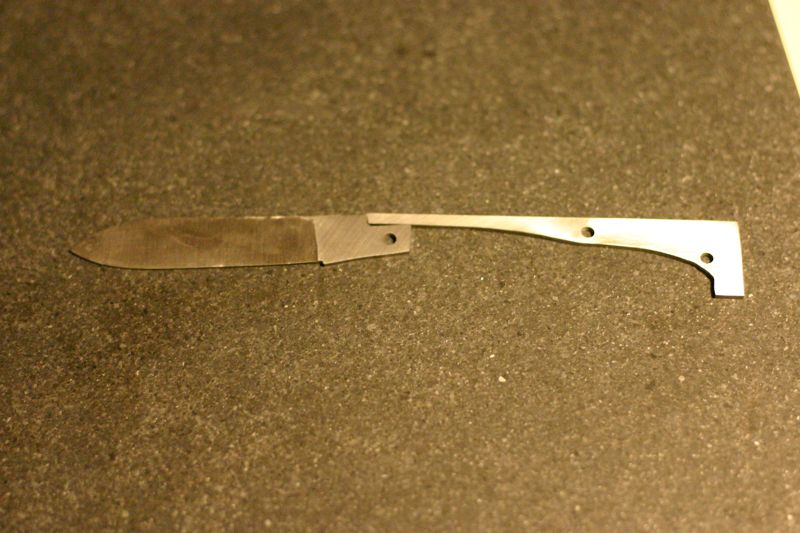 Post heat treat, the blade is in the tempering oven and I've used a micro-torch to temper the spring back to what I hope is spring temper. I was aiming for about 50-54RC, and according to my notes that should be around 700 degrees F, or just back to dark grey by color. It looks like I hit the mark, but we'll find out for sure when the blade comes out of temper and I put the final pin in the jig and test the action. 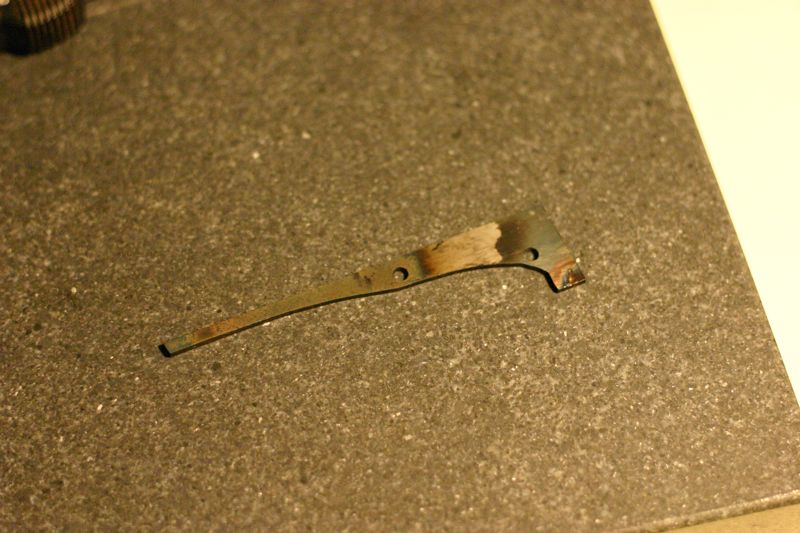 Next step is to test the spring and get the handles profiled out. If all goes well (and has gone well today  ) I should be ready for final assembly tomorrow (Sunday). ) I should be ready for final assembly tomorrow (Sunday).Questions, comments, criticisms? Please post them - I've got thick skin and am itching to learn!
__________________ Kurt Huhn pipecrafter@pipecrafter.com http://www.pipecrafter.com
|
|
#4
12-26-2009, 05:08 PM
|
|||
|
|||
|
Just FYI - don't go above 50RC for a slipjoint spring -- 48-50RC would be a much better target hardness. Go above 50 and your spring will eventually break (along with not acting very much like a spring). Most of your other setup and proportions look good. Spring depth at the tang looks good.
Are you planning to do your pre-tensioning of the spring by adjusting the placement of the head pin before drilling the scales?
|
|
#5
12-26-2009, 05:19 PM
|
||||
|
||||
|
Good info on the spring - thank you!
I had actually planned on doing the pre-tension by adjusting the placement of the rearward pin. That's how I did it on my jig and it turned out very well. I'm open to ideas though. What's the established method for setting tension on a slipjoint? __________________ Kurt Huhn pipecrafter@pipecrafter.com http://www.pipecrafter.com
|
|
#6
12-26-2009, 05:27 PM
|
|||
|
|||
|
There are lots of different way to do pre-tension -- but that's about the simplest I know of. Just don't overdo it - it's easy to make the pretension too strong -- 1/32" to 3/64" pretension offset is typical.
BTW, considering that you're eyeballing the spring tempering, I'd shoot for the 45-48RC range, just to be on the safe side.
|
|
#7
12-26-2009, 06:24 PM
|
||||
|
||||
|
Final update for Saturday:
The blade is out of heat treat and sanded to final finish on the machinists plate. I put the third pin in the jig, set preload, and everything lines up perfectly: Closed: 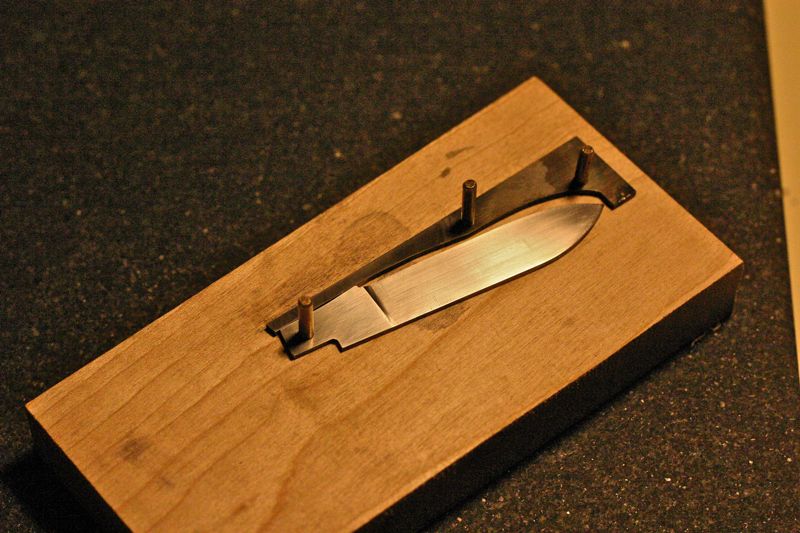 Half Stop (actually about 7/16 stop): 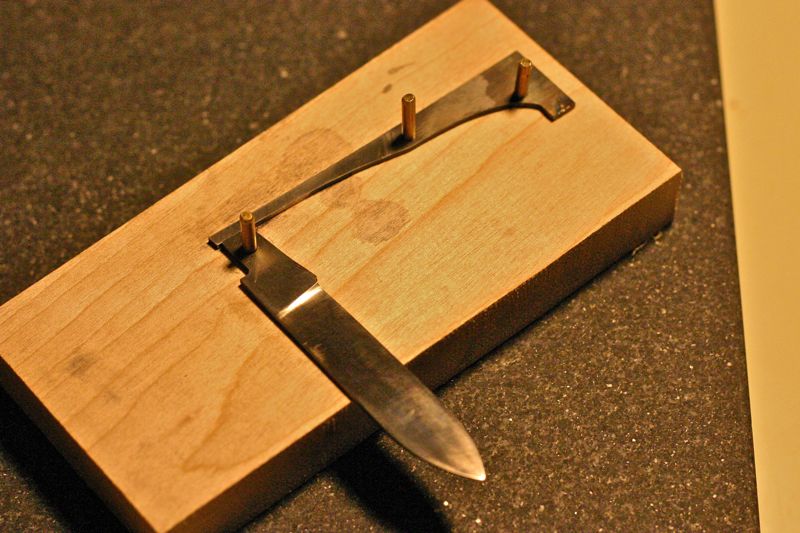 Open: 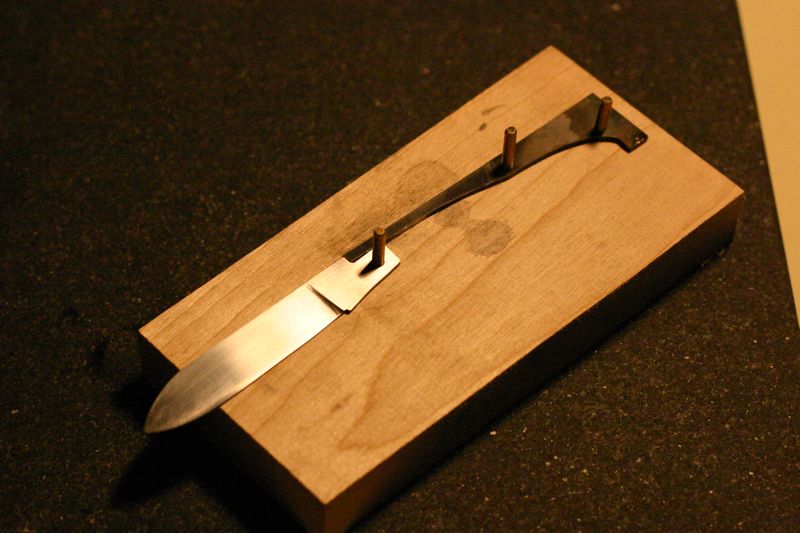 All that's left is handles. At this point the action is very good even dragged down by the wood. It's got a healthy snap at all three positions, and the open and closed positions are firm and positive. So far, so good! __________________ Kurt Huhn pipecrafter@pipecrafter.com http://www.pipecrafter.com
|
|
#9
12-27-2009, 01:31 PM
|
||||
|
||||
|
Taking a short break to let the air filter in the workshop do it's work, so here's the next installment.
This morning I etched my initials on the blade and made some washers. I spent way more time on the washers than I needed to, since I didn't have any 1/8" x 1/4" washers. I won't even go into what I did since it was about the most uneconomic thing I've done in months: 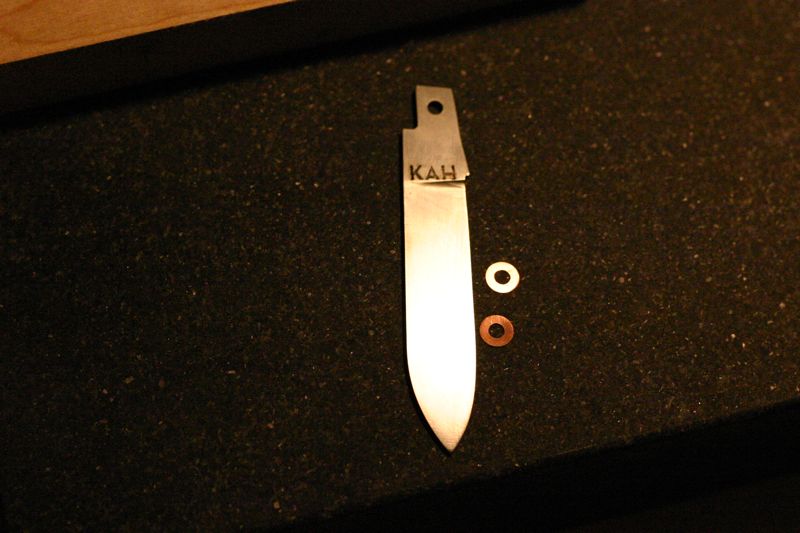 I temporarily assembled everything just loose so that I rough out the handle scales and the spring shape. Then I sliced off some nickel silver rod for the pins. Here's all the pieces ready for assembly: 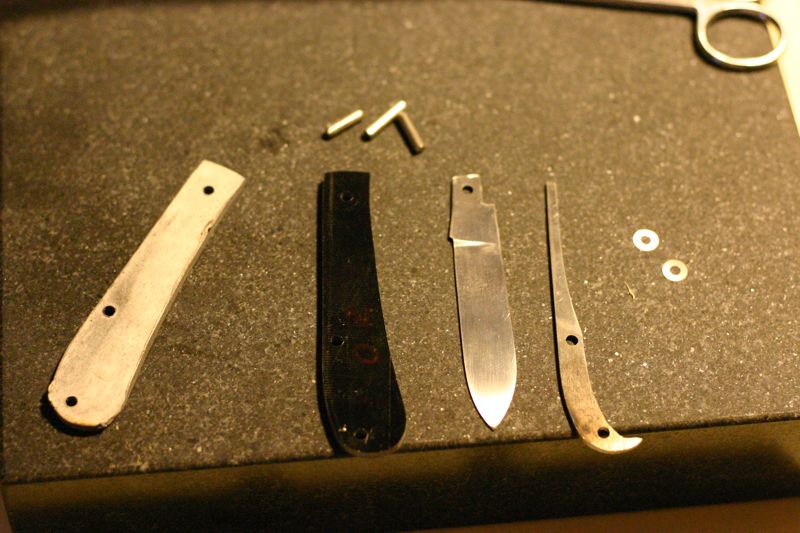 This is a test fitup of the slippy, just to ensure everything is going to go together like I want it: 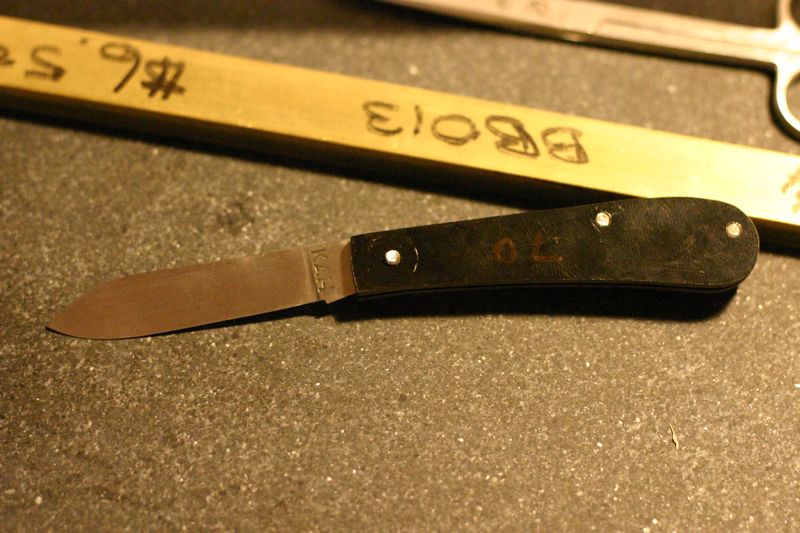 Looking good so far, but I want to fine tune the profile quite a bit and put a gentle curve on the surface of the scales. I also realized that I have no nail nick on this blade - and here I kept saying to myself that something just didn't look quite right. I'll have to add that before final fitup and assembly. Break is over - time to head back into the workshop and see if I can finish this puppy. __________________ Kurt Huhn pipecrafter@pipecrafter.com http://www.pipecrafter.com
|
|
#10
12-27-2009, 01:52 PM
|
||||
|
||||
|
I wondered about the nail nick--a lot of slipjoints would be really tough to open without one! Looking good so far, though! What material are you using for the scales?
__________________
|
|
#11
12-27-2009, 02:42 PM
|
|||
|
|||
|
With a linerless knife, assuming you're using Micarta or G10 scales, you really don't have to have the washers. But I assume you already made your blade tang thinner than the spring to allow for the thickness of the washers?
Just put a notch in the scales and turn it into an easy-opener -- no nail nick required. Last edited by zerogee; 12-27-2009 at 02:42 PM. Reason: typo
|
|
#12
12-27-2009, 03:43 PM
|
||||
|
||||
|
Zerogee is right, Noah - I'm using G10 for the handles. I was inspired to actually do this by a linerless slipjoint that Todd Davison made with G10 handles, so I'm keeping the faith on material, so to speak.
Here's a shot of the scales being relieved slightly to allow for the washers. I did make the tang slightly thinner than the spring, but it wasn't quite thin enough, so I had to take about .003 off each side of the scales. There's really no trick to this other than patience, a micrometer, patience, a flat surface to use, patience, and patience. 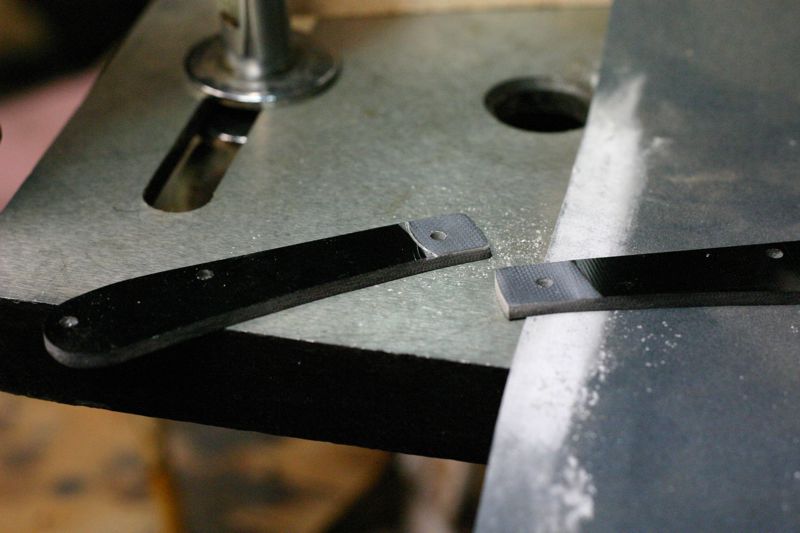 Before anyone asks - no, this is not an ideal method. In fact, it's about the worst way to do this as far as time is concerned. If I'm going to make a habit of making folding knives, I'm probably going to have to invest in a milling machine of some kind. However, it did work just fine. Next, I've assembled the knife and have peened the two rear pins. As I found out later, I may have gotten a litte carried away in the peening. Nothing bad, just some slight deformation of the handle material was evident around the pins. If you're going to get carried away though, these are the pins to do it on. When I peened the pivot I was very careful to stop and check the action while doing so. I did not use a shim, I really just went by feel. 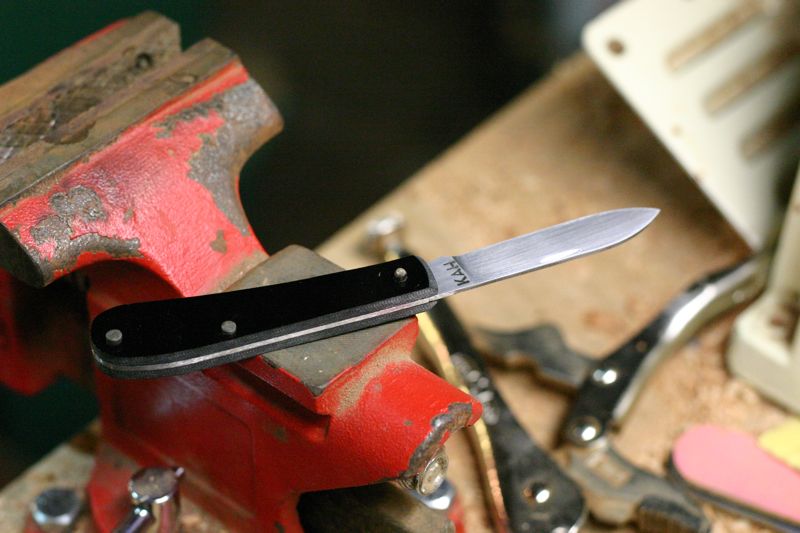 Next - shaping and sanding the handle.... __________________ Kurt Huhn pipecrafter@pipecrafter.com http://www.pipecrafter.com
|
|
#13
12-27-2009, 03:50 PM
|
|||
|
|||
|
Be careful sanding G10 -- make sure you're wearing a mask -- having a fan or something placed to blow the dust away from you as you work would also be good (if possible, working it wet would be even better). Breathing Micarta dust is nasty, but G10 dust is even worse for you.
|
|
#14
12-27-2009, 04:30 PM
|
||||
|
||||
|
Absolutely! I have a dust collector, shop filter, and I wear a respirator. Uncomfortable, loud, and inconvenient - but way better than screwing up the only set of lungs I have.
__________________ Kurt Huhn pipecrafter@pipecrafter.com http://www.pipecrafter.com
|
|
#15
12-27-2009, 04:49 PM
|
||||
|
||||
|
All finished!
I wanted to get some action shots of sanding, but I got engrossed in what I was doing, and forgot to stop and take pictures. Next time.... Anyway, on to the final product: 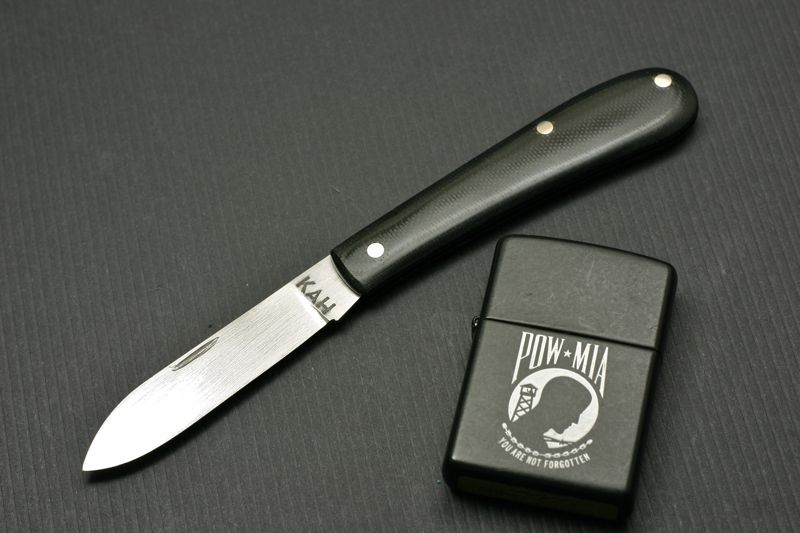 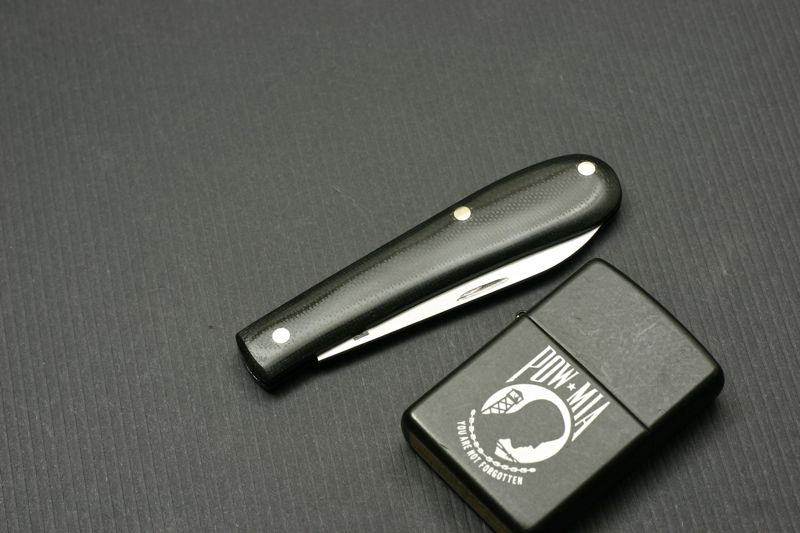  As you can see, I kind of buggered up the nail nick. It's not horrifying, but I wish it was more precise. Overall I'm very happy with the outome. Considering this was supposed to be, first and foremost, a learning experience, I'm just as pleased as could be. I learned a lot about slipjoint construction, as well as using my tools in a new way. AND I got a new EDC pocket knife out of the deal - which I'll be sure to test fully. I want to see how well my work will hold up to the type of abuse I put my personal knives through. Comments and criticisms are welcome - both on the knife and the thread. __________________ Kurt Huhn pipecrafter@pipecrafter.com http://www.pipecrafter.com
|
|
| Tags |
| blade, brass, folder, folding knife, kit, kits, knife, knives, pocket knife, supplies |
| Currently Active Users Viewing This Thread: 1 (0 members and 1 guests) | |
|
|
 Similar Threads
|
||||
| Thread | Thread Starter | Forum | Replies | Last Post |
| My first slipjoint - a big one! | Ruben Calo | The Display Case | 5 | 03-07-2010 05:05 PM |
| Slipjoint #6 | Jason Cutter | The Display Case | 5 | 12-14-2005 07:59 AM |
| Bob Ogg slipjoint... | Coop747 | The Display Case | 17 | 06-30-2002 09:36 PM |


 Linear Mode

