|
|
|||||||
| The S.R. "Steve" Johnson Forum Specialized knife making tips, technique and training for "ultra precision" design work enthusiasts. |
 |
|
|
Thread Tools | Display Modes |
|
#1
 01-29-2008, 05:19 AM
|
||||
|
||||
|
Bobs Hidden Pin Method
Hi Steve,
I thik that you are the the only Knifemaker that can accurately respond to the following question: -I have see a Bob Loveless drop Point knife without regular screws. In particular in knife description I have read that "the Scales are attached using Bobs Hidden Pin Method". I haven't information about this metod and I want ask you if you know it and if you have used. 
|
|
#2
01-29-2008, 10:37 AM
|
||||
|
||||
|
Bob and I did not use that method, or at last not very much when I was there, but he told me once that he just drills part way through the handle slab, then routs out and enlarges the bottom of the holes on each slab with a ball-end moto tool. Then he cuts a screw just long enough to reach almost to the bottom of each hole as it goes through the handle, fills holes and covers the tang with epoxy and puts the handle together with the screws in place. The threads on the screws give lots of "grip" for the epoxy and the enlarged bottoms of the holes work as a "head" for the epoxy as it also holds onto the screw. (Make any sense?) You can add a thong tube also. Of course, you must drill the hole for the thong tube as you are fitting the sides up. Hope this helps. I've done it a couple of times, I think. Seems to work quite well.
__________________  http://www.srjknives.com NRA Endowment Member Knifemakers' Guild Member since 1971 "May you live all the days of your life." - Jonathan Swift Last edited by Steve; 01-30-2008 at 09:11 AM. Reason: add
|
|
#3
01-30-2008, 03:58 AM
|
||||
|
||||
|
OK! Steve I think I have understood correctly. I want try.
Thanks
|
|
#4
01-30-2008, 09:13 AM
|
||||
|
||||
|
I'll draw up a little picture and email it to you.
__________________ http://www.srjknives.com NRA Endowment Member Knifemakers' Guild Member since 1971 "May you live all the days of your life." - Jonathan Swift
|
|
#5
01-31-2008, 12:48 AM
|
||||
|
||||
|
Steve, it is Fantastic!!!
thanks
|
|
#6
02-01-2008, 11:44 AM
|
||||
|
||||
|
I emailed the drawing today, Riccardo. I hope it is of some help, despite it's less than engineer quality!!!
__________________ http://www.srjknives.com NRA Endowment Member Knifemakers' Guild Member since 1971 "May you live all the days of your life." - Jonathan Swift
|
|
#7
02-02-2008, 08:52 AM
|
||||
|
||||
|
Is a very clear drawings!
Thanks
|
|
#8
10-23-2012, 07:52 PM
|
|||
|
|||
|
Loveless hidden pin design
Steve do you mean that he would drill the pin hole from the under side of the scale and attach the screw to the tang and then fill the enlarged hole with epoxy and fasten it all togeter?
I can picture it in my mind, I am more of a visual learner.  Thanks Brian Otherly abled Sportsman
|
|
#9
10-24-2012, 01:54 AM
|
||||
|
||||
|
Yes, I believe Bob would thread the hole(s) in the tang and turn a size 8-32 screw into the hole. Then cut off the screw so that about a 3/32-1/8" stub would protrude on each side. Then in the drilled holes in the slabs he would enlarge the bottoms fo the holes, so that they were wider at the bottom, with a small round moto tool burr. Then assemble the handle with epoxy and the glue would attach to the screws and fill in the enlarged holes in the slabs and anchor the handles in place. If this in not clear, ask for more details, OK?
__________________ http://www.srjknives.com NRA Endowment Member Knifemakers' Guild Member since 1971 "May you live all the days of your life." - Jonathan Swift
|
|
#10
10-24-2012, 04:48 PM
|
||||
|
||||
|
I will have my friend Romano Artesanais post some photos fo one way to do the pin less attachments of the handle slabs. You can use small, or larger screws, either way will work. Just be sure you don't drill the hole into the slab so deep that you grind into it when you shape the handle. Wouldn't hurt to actually pre-shape the handle pieces to almost finished thickness before you assemble them.
__________________ http://www.srjknives.com NRA Endowment Member Knifemakers' Guild Member since 1971 "May you live all the days of your life." - Jonathan Swift
|
|
#11
10-24-2012, 04:55 PM
|
||||
|
||||
|
Hello dear friend, Steve Johnson.
I would like to give my contribution with that pictures. I hope it helps. Best regards, Romano First, if you are going to go "pinless" you need to drill and tap the hole(s) in the tang: 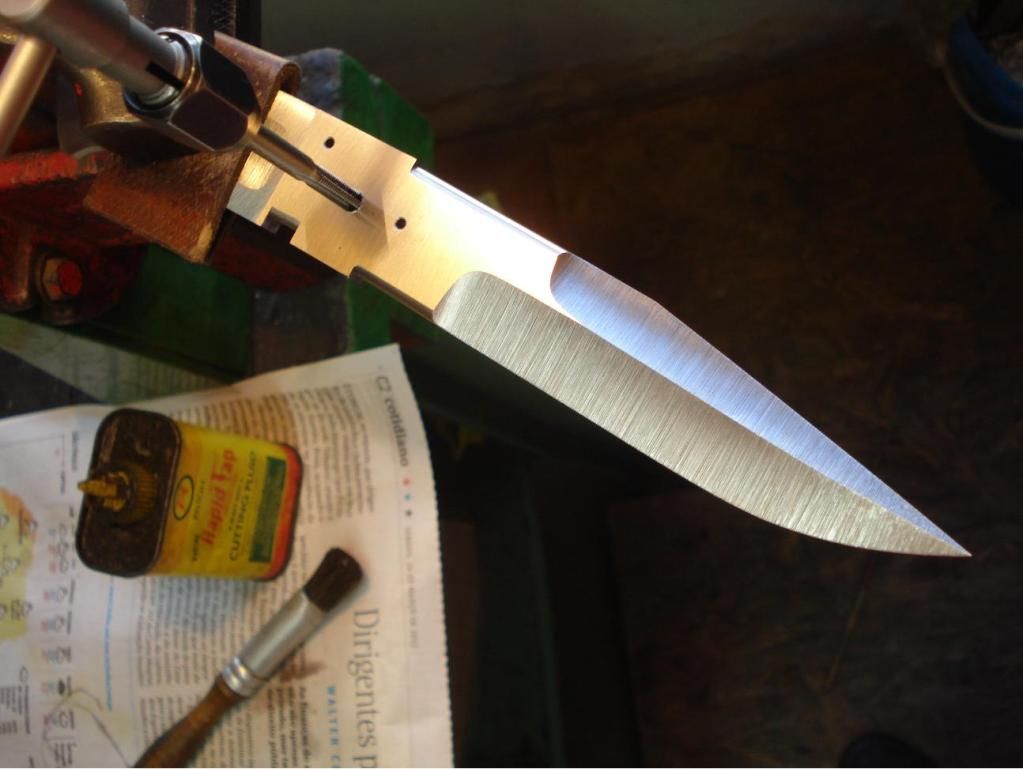 Then, fit the handle, mark the hole locations and drill about 1/8"....or less....into the handle material. (depending on how thick the handle piece is. For the front piece of a sub-hilt, be careful, as sometimes they are no thicker than 1/8"!) You would be wise to pretty much shape the handle pieces close to final thickness & dimensions. You don't want to grind into the blind hole while shaping the handle. Then "rout out" the bottom of the hole, so that the corners/bottoms of the hole are larger/wider, slightly, than the original sides, giving the glue a place to flow into and basically creating a "head" of glue on the end of the threaded rod, or screw when it solidifies. Use a small, 1/8" - or smaller - burr in your moto-tool, or dental drill-type hand machine. 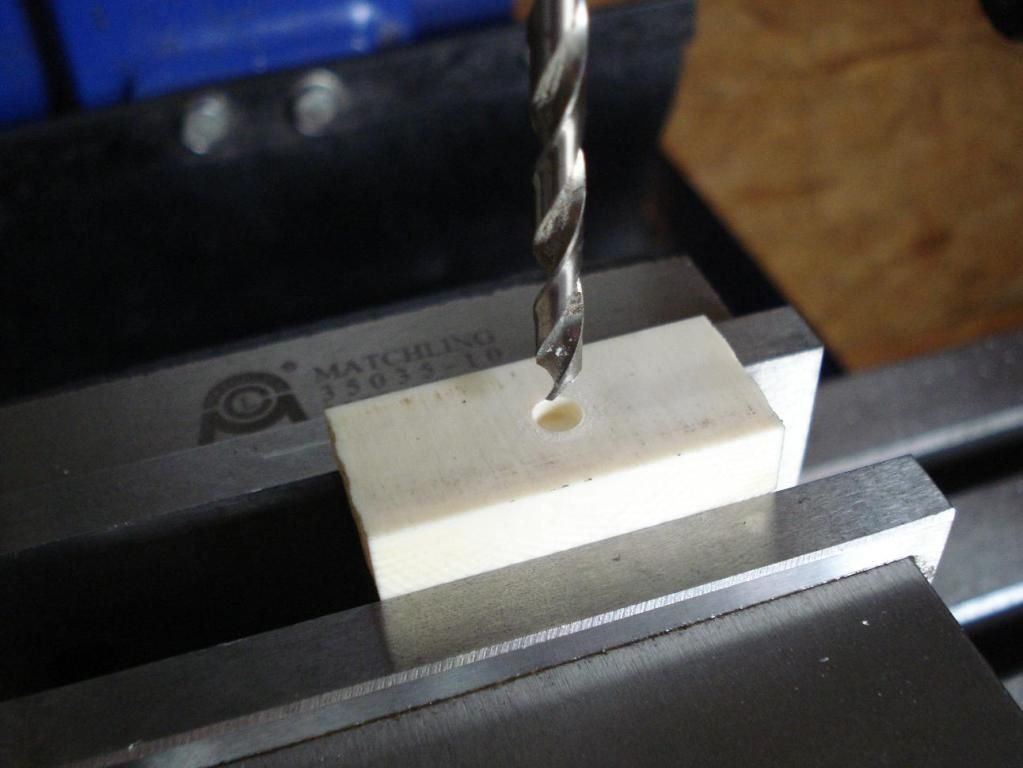 Put the screw, or threaded rod through the tang. Test how it fits into the blind-hole in the handle material. Make it shorter in length than the blind hole is in depth. 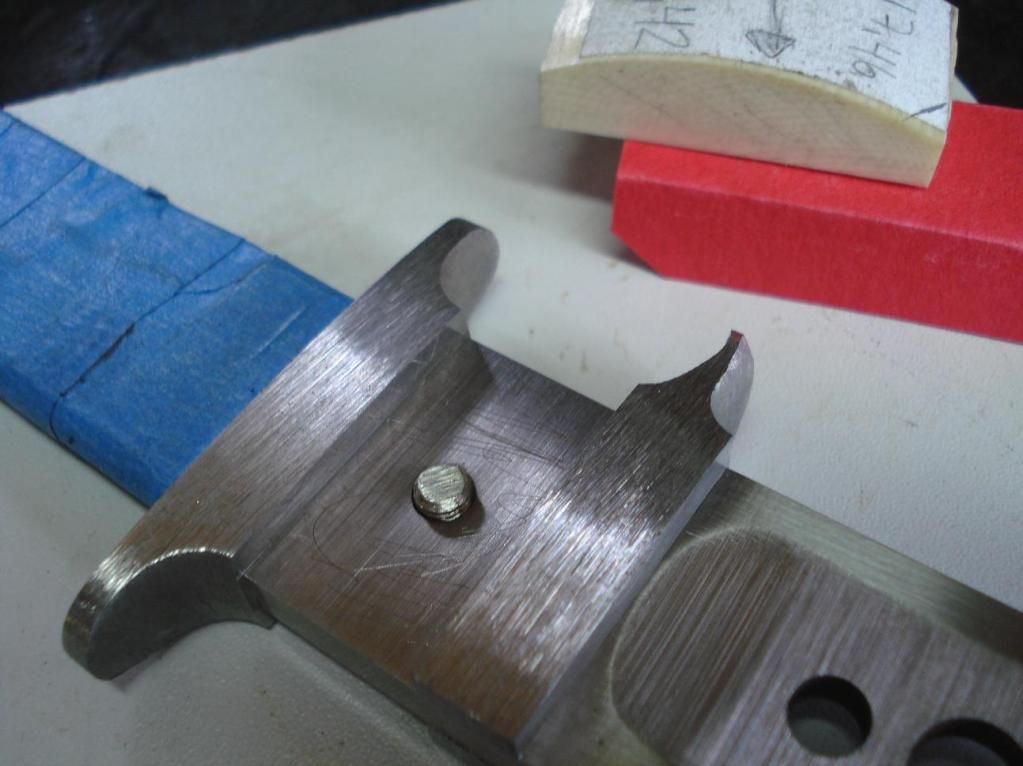 Glue the handle piece in place, clamping it in place, so it doesn't migrate out of perfect fit, using slow-set, thick super glue, epoxy, or whatever glue you use. It ought to be fairly thick, so you can fill the blind hole and keep it there while assembling. Same reason for the screw stud that fits into the hole. Cover it with glue, too. Thank you, Romano, my friend. The pictures are perfect! 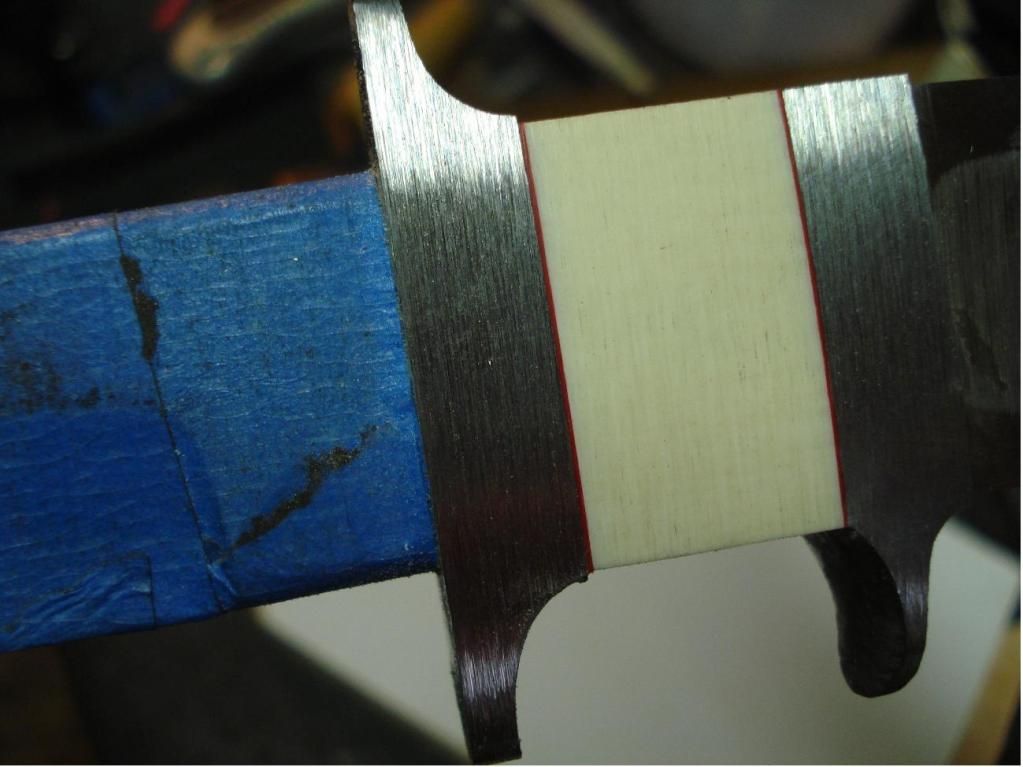
__________________ RICARDO ROMANO BERNARDES / RFA Romano Facas Artesanais (Romano Custom Knifemaking) Itajub?, MG - Brazil E-mail: cutromano@yahoo.com Last edited by Steve; 10-24-2012 at 10:32 PM.
|
|
#12
10-24-2012, 07:00 PM
|
||||
|
||||
|
It is also had doubts on that method and I had precious information with the friends. Jim Merrit, Rick Clow and Thad Buchanan. I made some test and it works very well.
Romano __________________ RICARDO ROMANO BERNARDES / RFA Romano Facas Artesanais (Romano Custom Knifemaking) Itajub?, MG - Brazil E-mail: cutromano@yahoo.com
|
|
#13
10-25-2012, 05:24 AM
|
||||
|
||||
|
Thank you very much Ricardo.
|
|
| Tags |
| assemble, design, drill, fastener, grind in, handle, hidden, made, post, tang |
| Currently Active Users Viewing This Thread: 1 (0 members and 1 guests) | |
|
|


 Linear Mode

