|
|
|||||||
| The Display Case A place to post your latest knives and creations. Let the Knife Network community see your work first! |
 |
|
|
Thread Tools | Display Modes |
|
#1
|
||||
|
||||
|
Birch bark w/hamon
I present, my first "hybrid" tang. Not sure if there is already a term for it. Integral would not be correct, since the bolsters are soldered on. Made this one for myself to carry.
1084 differentially hardoned bowie. 1/4" line cutter and filework on the spine, with the cuts being cold blued for more contrast and a bit more corrosion protection. 416 soldered full tang bolsters and 416/brass/copper/brass/416 end cap, pinned and peined onto the 3/16" x 3/4"+ wide tang. Betula papyrifera stacked handle. Sharpened with my new hard black Arkansas stone (WAY nicer than the India stone from Home Depot, in regards to holding oil, durability, grit, getting clogged, everything). Sheath is also my work, but second ever so still getting the hand of it. Things I learned with this knife - first attempt at hamon lines, have to say I'm pretty happy with it. Could still use a bit more practice soldering, both on the bolsters and hard 75% solder on the butt cap pieces. Sheath needs most improvement. Need to make bigger stitch holes. Had blisters using pliers to pull every stitch. Also could get away with wider spacing. Belt look needs to be longer. Also, on the snap making contact with the knife, need to slice the end of the strap and set the snap on the top half only so it doesn't mar the handle. Most important thing I learned is a birch bark handle feels NICE! Much nice than wood or leather, in my opinion. Is a bit softer though. Next time, I could benefit from compressing the birch spacers more. Oh I guess looking at the pictures now I should have wiped the blade lol. Towards the bolster on the blade, thats just a bit of oil. 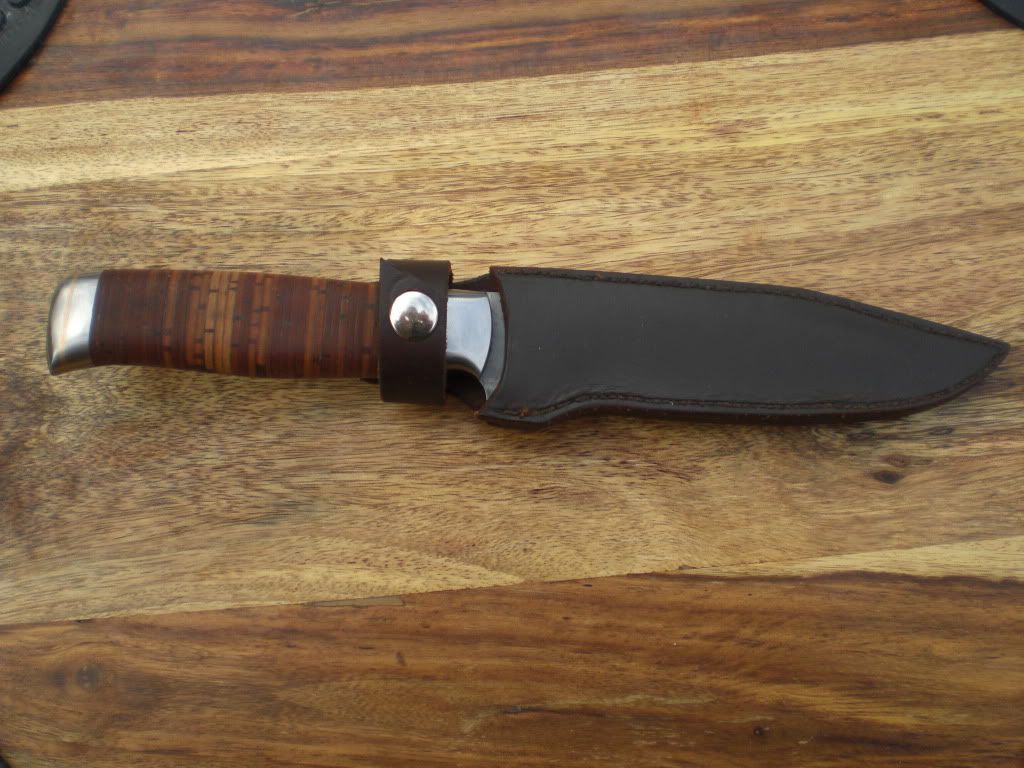 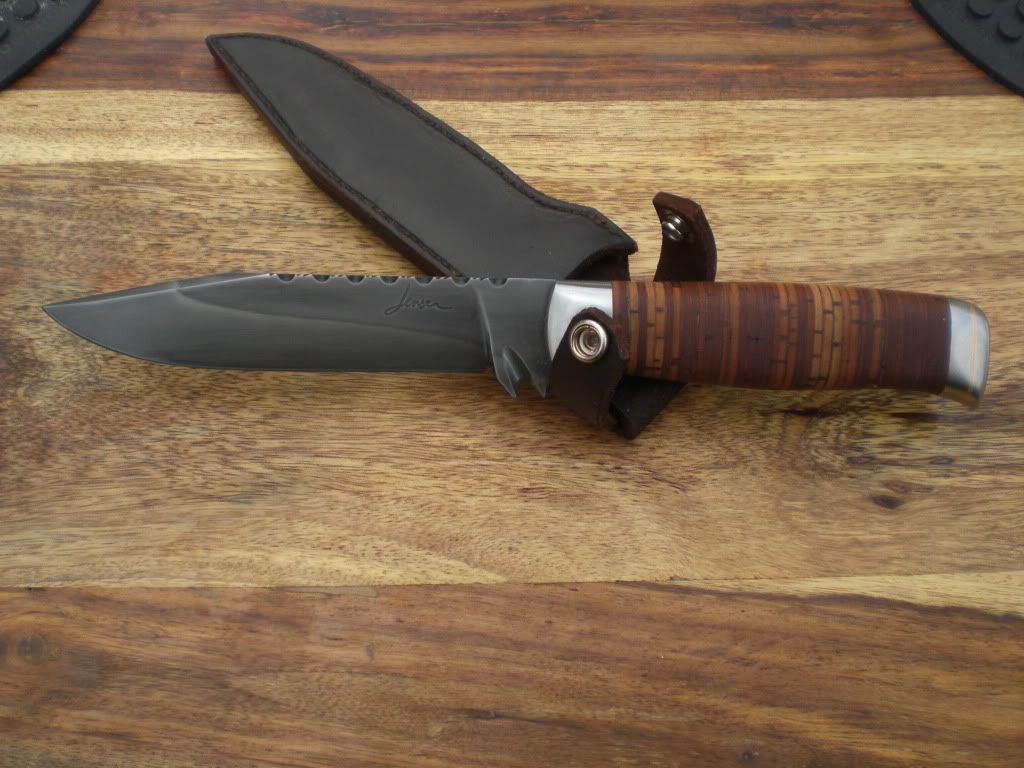 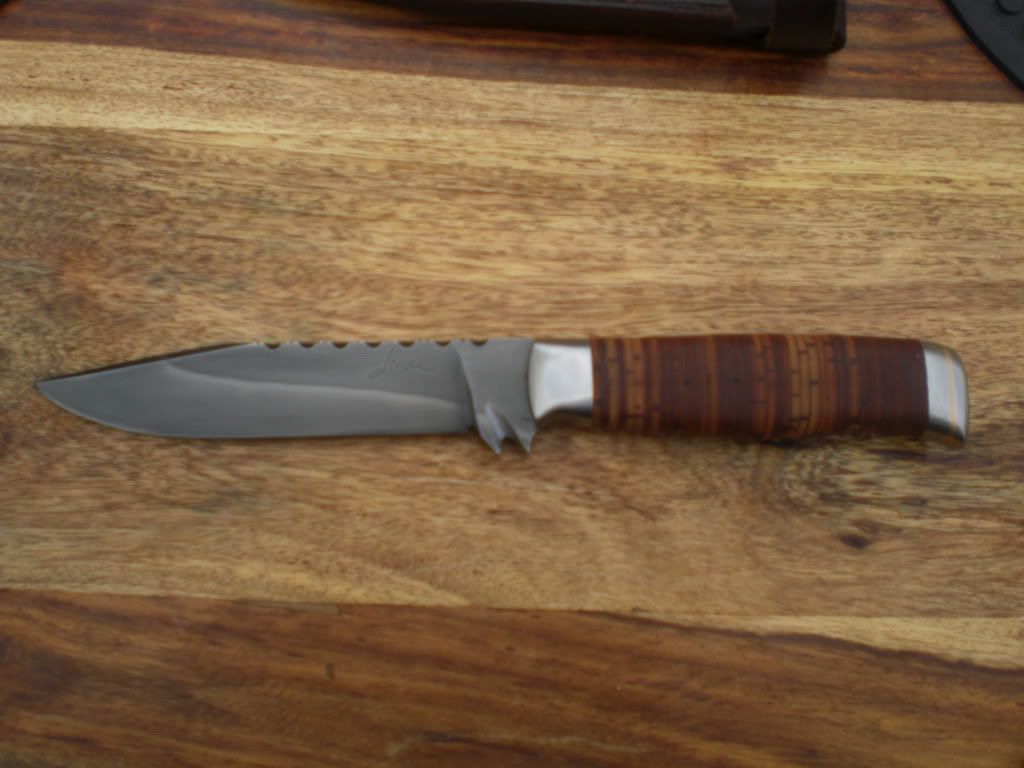 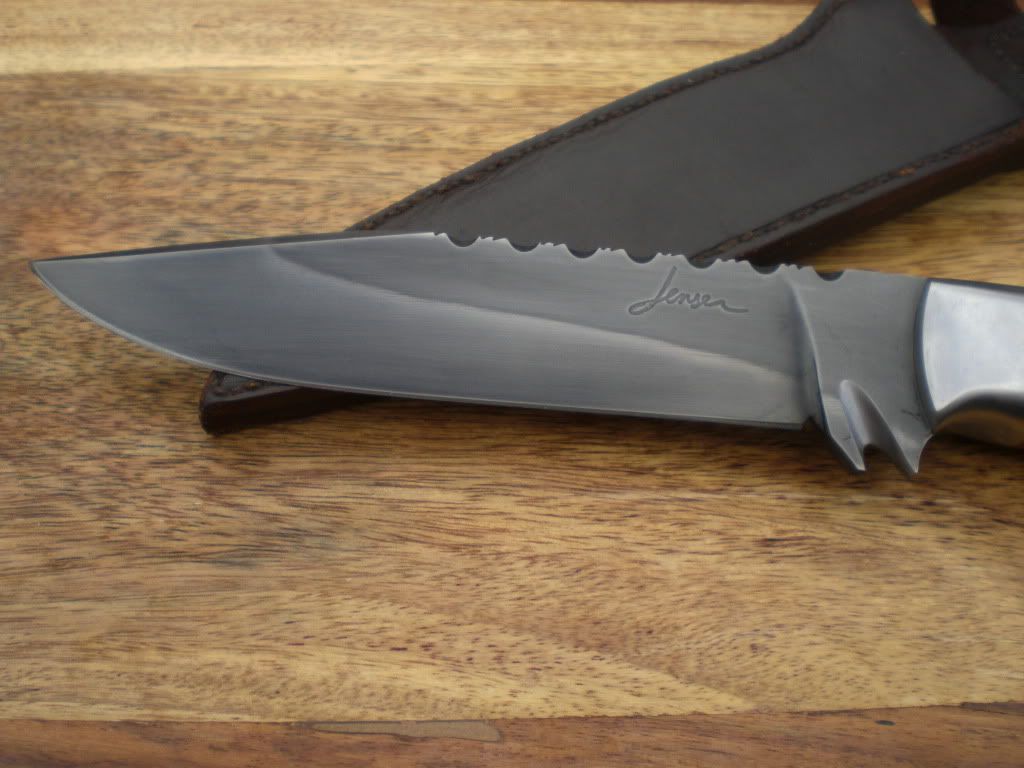 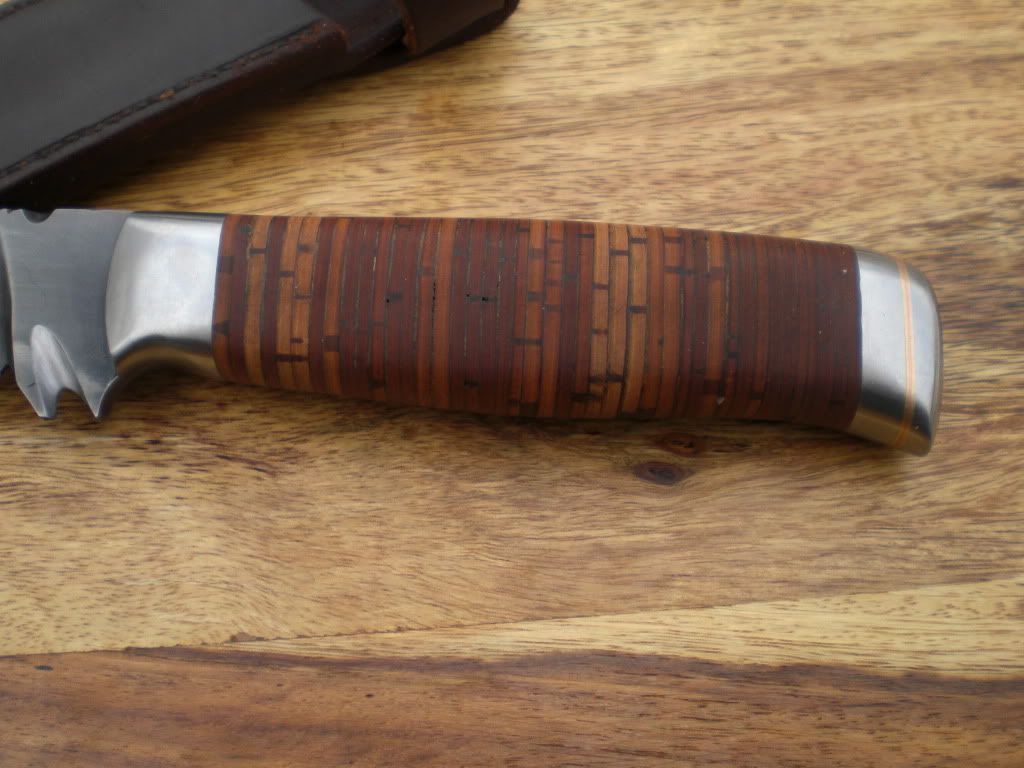 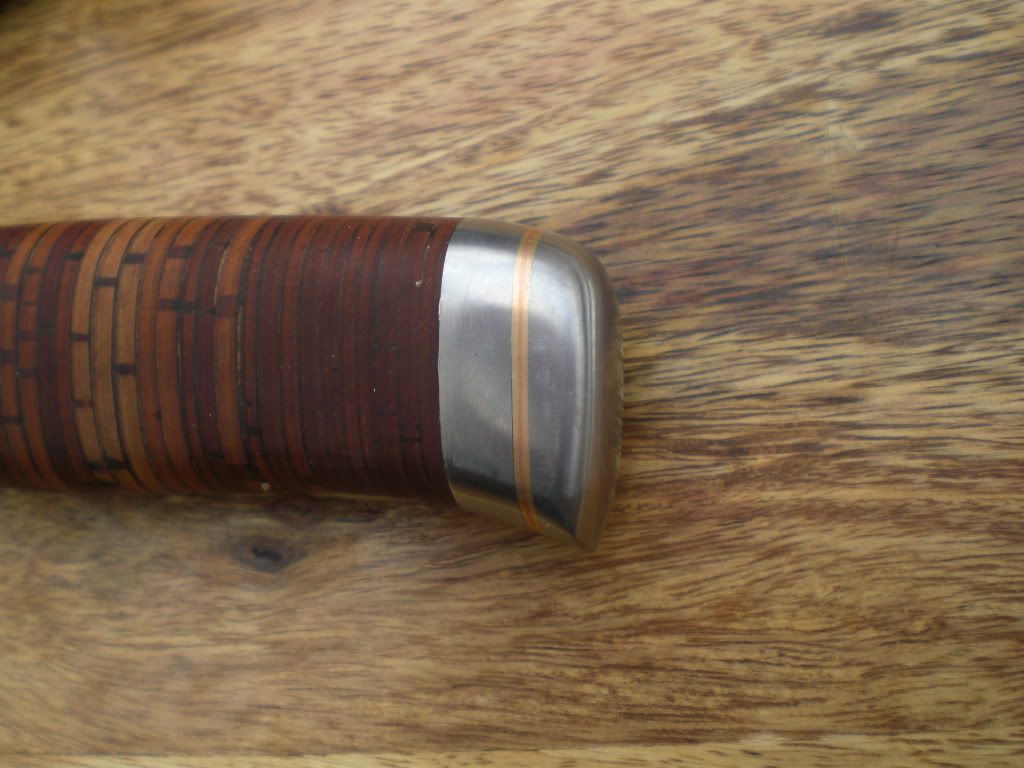 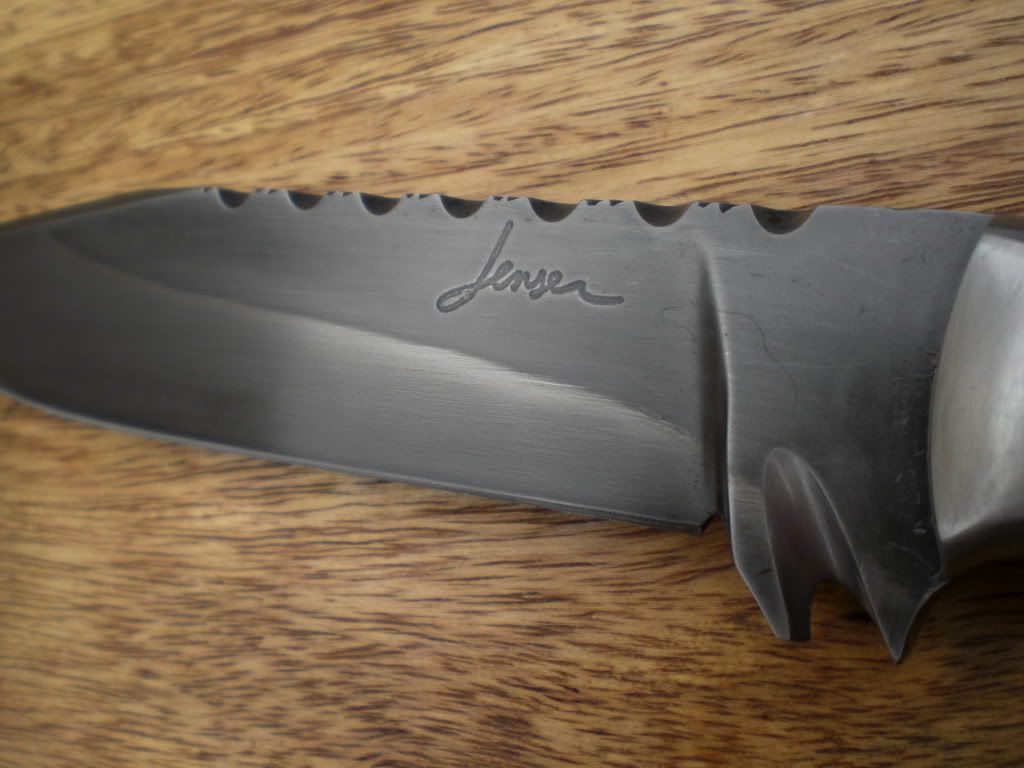 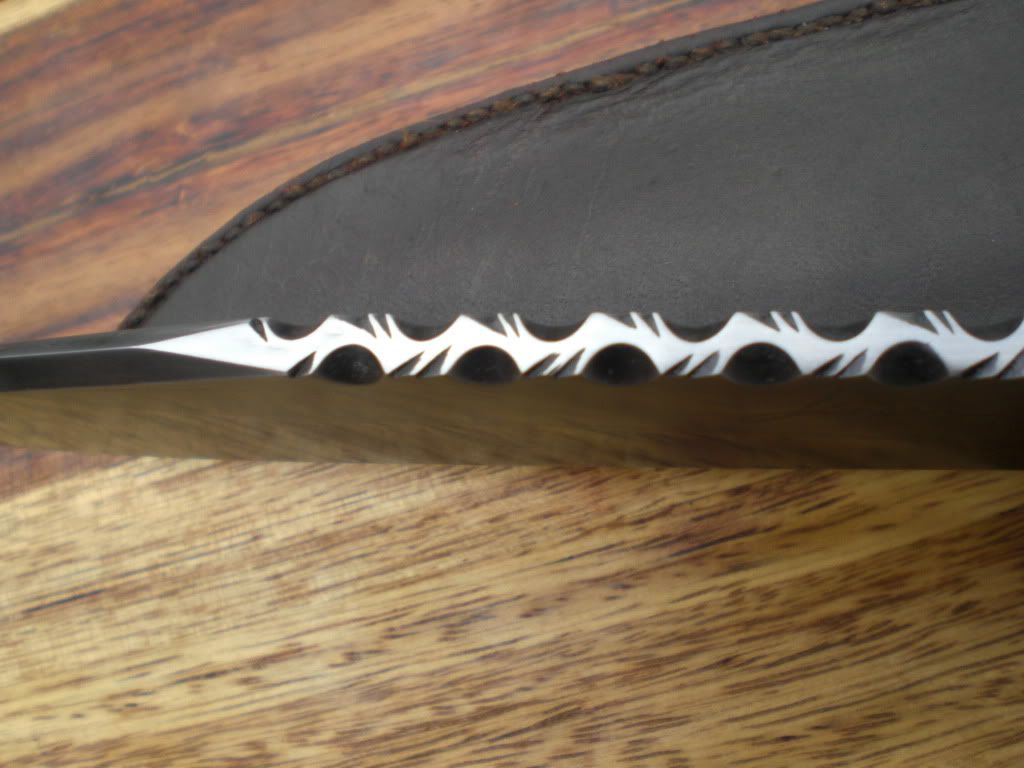 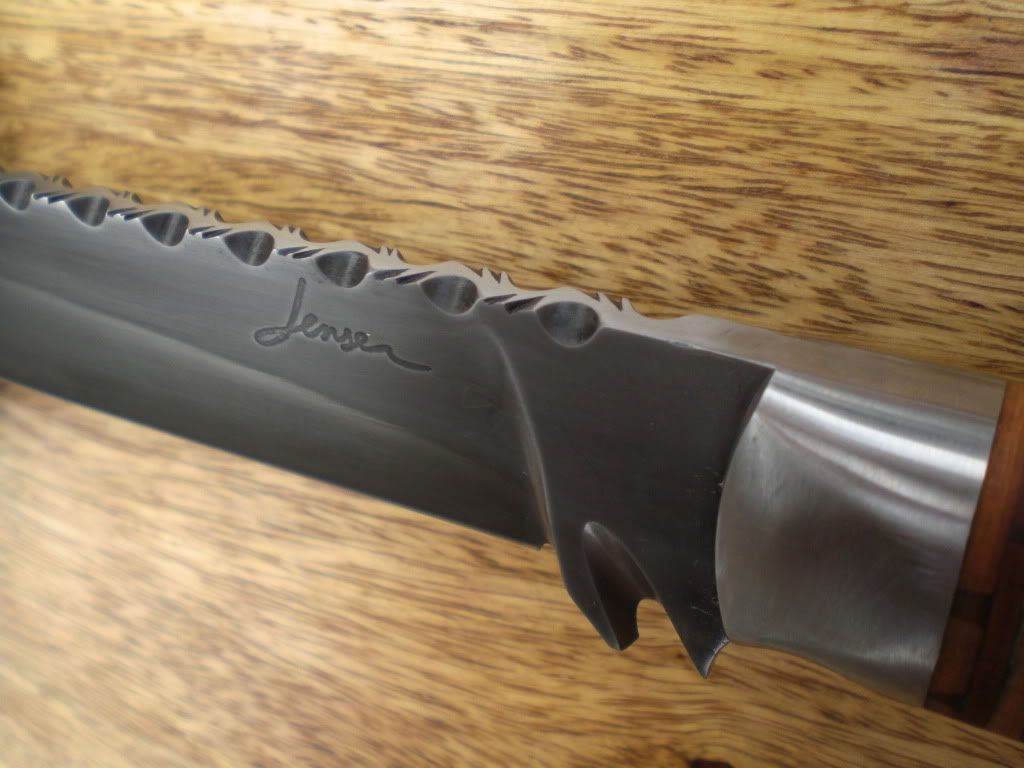
|
|
#2
|
|||
|
|||
|
Never thought of Birch bark for a handle, I have to say it looks great. That is a awesome looking knife.
Brett |
|
#3
|
|||
|
|||
|
Very nice work. I first thought it looked kind of like stacked cork on the handle. How did you finish the 1084 - what grit did you end up with? Congratulations again on a nice piece of work.
Russ __________________ Russ |
|
#4
|
||||
|
||||
|
It feels very similar to cork, but much less brittle. The blade is finished to 600 grit. I used ferric chloric acid to etch the blade. I think I sanded it and etched it a few times to bring out the line. Glad you guys like it.
I'm working on some new variations of this model, but with bronze instead of steel, I think that would go with the colors nicely. |
|
#5
|
||||
|
||||
|
Eli
Thank You for sharing the pic, can I ask a couple of questions? I love your file work on this one, did you do it all by eye? Did you buy the Birch bark or did you harvest it yourself? How long does the bark need to dry, before you work it into a handle? Did you make your own handle press, or did you find one good enough to purchase? I use the same press I made for stack leather handles, that I made, just cant get the results you did,LOL. Jeff |
|
#6
|
||||
|
||||
|
This is one of the most beautiful knives I've seen I think. I would love to see it with the bronze.
Awesome work. |
|
#7
|
||||
|
||||
|
Thanks R Pope and Jeff.
I measure out all the circular cuts with a ruler and a sharpie, after that it is all by eye. Unfortunately there is a distinct lack of birch in Arizona. I get it from a guy in Michigan, via ebay. I imagine it would only take a couple of weeks to dry, and im sure it must be clamped to keep from warping. I just some from him for my canoeing knife and they are THICK like pushing 3/16". I am going to try and collect some while canoeing this summer though. I did not use a press. I stacked the bark, and like I mentioned in the OP, could have done a better job of whacking them down. I had run out of washers, so was scrambling to punch holes in more before the epoxy set, so wasn't thinking. The back bolster is attached with a 1/8" pin through the tang which fits halfway through the inside of the bolster. I stack the bark so it goes past that pin hole, all the way to the top of the tang, so when I put the bolster on it compresses. I push the bolster down manually, just long enough to put the pin in. The pin is oversized like 2-3x needed length, with a LONG taper to a fine point. I do this so it will go through the pin hole even if the bolster is not compressed enough, lining up the two holes, and its impossible to tell with the epoxy in there. Trust me, if you don't thoroghly taper your pin, you will never get it in there and you will be so darn frustrated. Then I hammer it through and nothing is going anywhere. No need for further compression, just cut and pein the pins before the epoxy dries. I've had success with this method on leather as well. R Pope, I also would love to see it in bronze but am having trouble sourcing the alloy I want. |
|
#8
|
|||
|
|||
|
Eli:
You probably already know this, but the way I do a stacked leather handle and compress it is to either cut threads on the end of the tang or weld a piece of threaded stock to it. It's so easy from there on. I then have a loose fitting brass spacer (or whatever you choose) at the end next to a threaded pommel. Screw the pommel on until it's tight as you can get it and let dry. You can finish belt sanding the entire handle until you're finished. Some folks use additional sealers and such after final sanding - your choice. I like to buff everything out myself. By using this method, you are assured a tight fit. Thanks again for the insight. __________________ Russ |
|
#9
|
||||
|
||||
|
Yes that is a very similar method, using the same idea. Are you ever worried about the threads failing? I have not tried it with non-ferrous, yet, but to get that steel pin to break would be quite a task. The only way it could fail is if you managed to hammer and/or pull the pin out, even though its peined. It is a pain, especially with steel, to pein it perfectly flush though, not a problem with your method.
|
|
#10
|
|||
|
|||
|
Eli:
I'm probably the only knife maker to make a leather handle knife this way - right or wrong, its been working for me for years and years. It's also a self taught method - I'm sure there are better ways. First, I use my mig welder to weld some threaded stock to the tang - others like to forge round then use a die to cut threads. I then cut square pieces of leather and stack each piece on covered front and back with a thin coat of Elmer's glue. I add the spacer - not threaded then I fill the pommel's threaded hole full with epoxy. Once it's full, I screw it on as tight as I can get it. When everything is dry, I doubt you could beat the handle off. Attached is my version of a Scagel with a little taste of my Cherokee roots on the sheath. It's not perfect, but it feels good to the hand. The customer who owns it, loves it. I know another knife maker who used all epoxy all the way through the handle. I think the epoxy makes the handle a little too hard for my liking. Just my 2 cents worth. There's probably a dozen ways to skin a cat as they used to say. __________________ Russ |
|
#11
|
||||
|
||||
|
Well it looks like it works just dandy. I only use epoxy to create a seal against moisture. A little hardness in birch bark, good. In leather I think you are right that it is not necessary. I like these methods because glue is not necessary to hold anything in place, which is so common in most methods.
|
|
#12
|
|||
|
|||
|
That is a dandy! I wouldn't turn that one down. Was that hamon done with a torch?
|
|
#13
|
||||
|
||||
|
Edge quench
|
|
#14
|
|||
|
|||
|
Nice
 I was going to edge quench mine but the shape wouldn't let me. I was going to edge quench mine but the shape wouldn't let me.Just got back from a camping trip yesterday and picked up some birch bark 
Last edited by metal99; 07-09-2012 at 10:31 AM. |
|
#15
|
||||
|
||||
|
Great job, I llike it.
|
 |
| Tags |
| awesome, blade, bowie, brass, cold, edge, forge, full tang, hammer, hamon, handle, knife, knives, leather, pins, press, sheath, steel, stone, tang |
| Currently Active Users Viewing This Thread: 1 (0 members and 1 guests) | |
|
|
 Similar Threads
|
||||
| Thread | Thread Starter | Forum | Replies | Last Post |
| Bark-er-ized handle | skipknives | Knife Making Discussions | 3 | 05-06-2008 12:42 PM |
| Finishing+keeping birch bark clean | Physh | Knife Network Community | 1 | 10-28-2004 09:52 PM |
| Mammoth Bark ,Teeth, and blanks | Samilia | The Supply Center | 5 | 11-14-2003 01:32 PM |
| bark ivory and mokume hunter | droppoint | The Display Case | 4 | 08-04-2003 06:56 PM |
| Wanted, Bark Ivory... | Colin KC | General ::: Items and Bargains | 4 | 06-09-2002 06:53 AM |